

Setting up email forwarding rules through your hosting provider can enhance your email management, allowing you to automatically redirect incoming messages from one address to another. This feature is especially useful for managing multiple email addresses, filtering spam, or ensuring important emails reach the right inbox. Here’s a step-by-step guide to help you set up email forwarding rules with your hosting provider:
Log in to Your Hosting Account
- Access Your Dashboard: Open your web browser and navigate to your hosting provider’s website. Log in to your account using your credentials (username and password).
- Navigate to Email Settings: Once logged in, look for an option that relates to email management. This could be under a section labeled “Email,” “Mail,” or similar. The exact terminology will depend on your hosting provider.
Find Email Forwarding Options
- Access Forwarding Settings: Within the email management section, search for options like “Email Forwarding,” “Forwarding Addresses,” or “Forwarders.” This is where you’ll set up your rules.
- Select Create New Forwarder: Look for a button or link that says “Add Forwarder,” “Create New Forwarder,” or similar. Click on it to start the process of setting up a new forwarding rule.
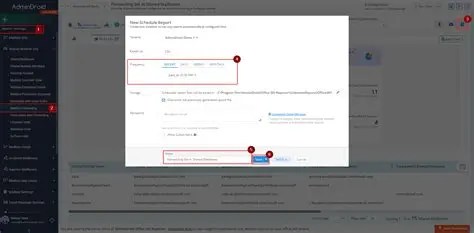
Configure the Forwarding Rule
- Enter the Source Email Address: In the “Forwarding” or “From” field, input the email address you want to forward messages from (e.g., [email protected]).
- Enter the Destination Email Address: In the “Forward To” or “To” field, input the email address where you want the messages to be redirected (e.g., [email protected]).
- Set Forwarding Options (if applicable):
– Keep a Copy: Decide whether you want to keep a copy of forwarded emails in the original inbox. Check the box if this option is available.
– Filters: Some hosts allow you to set filters or conditions for forwarding. For example, you might want to forward only emails that have specific keywords in the subject line.
Save and Test
- Save the Forwarding Rule: Once all fields are completed, look for a “Save,” “Create,” or “Submit” button to finalize the forwarding rule.
- Test the Forwarding: After creation, send a test email to the original address to ensure it’s being forwarded correctly. Check the destination inbox to confirm that the email arrives.
Manage and Edit Forwarding Rules (if needed)
- Review and Edit: If you need to make changes to your forwarding rules later, go back to your email management area. There, you should see a list of existing forwarders. Select the one you wish to edit and make your adjustments.
- Delete Forwarding Rules: If you want to remove a forwarding rule, use the same management area to find the forwarder and select “Delete” or “Remove.”
Check Hosting Provider Support Documentation
– Refer to Support: If you encounter any difficulties or need more specific information, refer to your hosting provider’s support documentation or help center. They may have tutorials or FAQs tailored to their interface that can assist you.
Conclusion
Setting up email forwarding rules with your hosting provider is a straightforward process and a valuable step in managing your email communications effectively. By following these steps, you can ensure that important messages are redirected to your preferred inbox, enhancing your email efficiency. If you have questions or run into issues, don’t hesitate to reach out to your provider’s support team for help.